Setup your cluster with gitops
Welcome to eksctl gitops Quick Starts. In this guide we will show you
how to launch fully-configured Kubernetes clusters that are ready to
run production workloads in minutes: easy for you to get started running
Kubernetes on EKS and to launch standard clusters in your organisation.
At the end of this, you will have a Kubernetes cluster including control plane, worker nodes, and all of the software needed for code deployment, monitoring, and logging.
Quick Start to gitops
gitops is a way to do Kubernetes application delivery. It works by using Git as a single source of truth for Kubernetes resources and everything else. With Git at the center of your delivery pipelines, you and your team can make pull requests to accelerate and simplify application deployments and operations tasks to Kubernetes.
Using gitops Quick Starts will get you set up in next to no time. You will benefit from a setup that is based on the experience of companies who run workloads at scale.
Prerequisites
To use EKS, you need to have your AWS account set up.
Next, you will have to have the following tools installed:
- AWS CLI: at least
1.16.156- older versions will require AWS IAM Authenticator to be installed too - a specific version of kubectl which works with EKS
Getting ready for gitops
The main point of gitops is to keep everything (config, alerts, dashboards, apps, literally everything) in Git and use it as a single source of truth. To keep your cluster configuration in Git, please go ahead and create an empty repository. On GitHub, for example, follow these steps.
Standing up your cluster
First we follow the usual steps to stand up a cluster on EKS. Please review the list of flags to see if you need to tweak it for your purposes. In essence it is going to be a variation of:
eksctl create cluster
Once it is finished, you should be able to check the cluster contents and see some system workloads:
kubectl get nodes
NAME                                              STATUS   ROLES    AGE   VERSION
ip-192-168-15-6.eu-central-1.compute.internal     Ready    <none>   39s   v1.13.8-eks-cd3eb0
ip-192-168-64-189.eu-central-1.compute.internal   Ready    <none>   38s   v1.13.8-eks-cd3eb0
$ kubectl get pods --all-namespaces
NAMESPACE     NAME                       READY   STATUS    RESTARTS   AGE
kube-system   aws-node-l8mk7             1/1     Running   0          45s
kube-system   aws-node-s2p2c             1/1     Running   0          45s
kube-system   coredns-7d7755744b-f88w7   1/1     Running   0          45s
kube-system   coredns-7d7755744b-qgc6r   1/1     Running   0          45s
kube-system   kube-proxy-kg57w           1/1     Running   0          45s
kube-system   kube-proxy-qzcmk           1/1     Running   0          45s
Enabling a gitops operator
The following command will set up your cluster with:
- Flux,
- Flux Helm Operator with Helm v3 support,
and add their manifests to Git, so you can configure them through pull requests.
The most important ingredient using eksctl enable repo is your config
repository (which will include your workload manifests, HelmReleases, etc).
You can start with an empty repository and push that to Git,
or use the one you intend to deploy to the cluster.


Run this command from any directory in your file system. eksctl will clone
your repository in a temporary directory that will be removed later.
eksctl enable repo \
    --git-url git@github.com:example/my-eks-config \
    --git-email <username>@users.noreply.github.com \
    --cluster your-cluster-name \
    --region your-cluster-region
Let us go through the specified arguments one by one:
--git-url: this points to a Git URL where the configuration for your cluster will be stored. This will contain config for the workloads and infrastructure later on.--git-email: the email used to commit changes to your config repository.--cluster: the name of your cluster. Useeksctl get clusterto see all clusters in your default region.--region: the region of your cluster.
There are more arguments and options, please refer to the gitops reference of eksctl which details all the flags and resulting directory structure.
The command will take a while to run and it's a good idea to scan the output. You will note a similar bit of information in the log like this one:
[ℹ]  Flux will only operate properly once it has write-access to the Git repository
...
[ℹ]  please configure git@github.com:YOURUSER/eks-quickstart-app-dev.git so that the following Flux SSH public key has write access to it
ssh-rsa AAAAB3NzaC1yc2EAAAADAQABAAABAQC8msUDG9tEEWHKKJw1o8BpwfMkCvCepeUSMa9iTVK6Bmxeu2pA/ivBS8Qgx/Lg8Jnu4Gk2RbXYMt3KL3/lcIezLwqipGmVvLgBLvUccbBpeUpWt+SlW2LMwcMOnhF3n86VOYjaRPggoPtWfLhFIfnkvKOFLHPRYS3nqyYspFeCGUmOzQim+JAWokf4oGOOX4SNzRKjusboh93oy8fvWk8SrtSwLBWXOKu+kKXC0ecZJK7G0jW91qb40QvB+VeSAbfk8LJZcXGWWvWa3W0/woKzGNWBPZz+pGuflUjVwQG5GoOq5VVWu71gmXoXBS3bUNqlu6nDobd2LlqiXNViaszX
Copy the lines starting with ssh-rsa and give it read/write access to your
repository. For example, in GitHub, by adding it as a deploy key. There you
can easily do this in the Settings > Deploy keys > Add deploy key. Just
make sure you check Allow write access as well.
Flux polls git at a set interval but you can tell Flux to sync the changes immediately with:
fluxctl sync --k8s-fwd-ns flux
The next time Flux syncs from Git, it will start updating the cluster and actively deploying.
If you run git pull next, you will see that eksctl has committed them to your
config repository already.
In our case we are going to see these new arrivals (flux and helm operator) running in the cluster:
$ kubectl get pods --all-namespaces
NAMESPACE              NAME                                                      READY   STATUS                       RESTARTS   AGE
flux                   flux-56b5664cdd-nfzx2                                     1/1     Running                      0          11m
flux                   flux-helm-operator-6bc7c85bb5-l2nzn                       1/1     Running                      0          11m
flux                   memcached-958f745c-dqllc                                  1/1     Running                      0          11m
kube-system            aws-node-l49ct                                            1/1     Running                      0          14m
kube-system            coredns-7d7755744b-4jkp6                                  1/1     Running                      0          21m
kube-system            coredns-7d7755744b-ls5d9                                  1/1     Running                      0          21m
kube-system            kube-proxy-wllff                                          1/1     Running                      0          14m
All of the cluster configuration can be easily edited in Git now. Welcome to a fully gitopsed world!
Enabling a Quick Start profile
The following command will set up your cluster with the app-dev profile, the first gitops Quick Start. All of the config files you need for a production-ready cluster will be in the git repo you have provided and those components will be deployed to your cluster. When you make changes in the configuration they will be reflected on your cluster.

Run this command from any directory in your file system. eksctl will clone
your repository in a temporary directory that will be removed later.
eksctl enable profile app-dev \
    --git-url git@github.com:example/my-eks-config \
    --git-email <username>@users.noreply.github.com \
    --cluster your-cluster-name \
    --region your-cluster-region
Let us go through the specified arguments one by one:
--git-url: this points to a Git URL where the configuration for your cluster will be stored. This will contain config for the workloads and infrastructure later on.--git-email: the email used to commit changes to your config repository.--cluster: the name of your cluster. Useeksctl get clusterto see all clusters in your default region.--region: the region of your cluster.- positional argument: this is the name of one of the profiles we
put together, so you can easily pick and choose and will not have
to start from scratch every time. We use
app-devhere.
There are more arguments and options, please refer to the gitops reference of eksctl which details all the flags and resulting directory structure.
This will load gitops Quick Start manifests into your repo. It will use
templating to add your cluster name and region to the configuration so that
cluster components that need those values can work (e.g. alb-ingress).
If you fetch the latest changes to your configuration repository, you will see that eksctl has updated it with the templated files from the Quick Start. The next time Flux syncs from this repo, it will start updating the cluster with the current configuration.
In our case we are going to see these new arrivals in the cluster:
$ kubectl get pods --all-namespaces
NAMESPACE              NAME                                                      READY   STATUS                       RESTARTS   AGE
amazon-cloudwatch      cloudwatch-agent-qtdmc                                    1/1     Running                      0          4m28s
amazon-cloudwatch      fluentd-cloudwatch-4rwwr                                  1/1     Running                      0          4m28s
demo                   podinfo-75b8547f78-56dll                                  1/1     Running                      0          103s
flux                   flux-56b5664cdd-nfzx2                                     1/1     Running                      0          11m
flux                   flux-helm-operator-6bc7c85bb5-l2nzn                       1/1     Running                      0          11m
flux                   memcached-958f745c-dqllc                                  1/1     Running                      0          11m
kube-system            alb-ingress-controller-6b64bcbbd8-6l7kf                   1/1     Running                      0          4m28s
kube-system            aws-node-l49ct                                            1/1     Running                      0          14m
kube-system            cluster-autoscaler-5b8c96cd98-26z5f                       1/1     Running                      0          4m28s
kube-system            coredns-7d7755744b-4jkp6                                  1/1     Running                      0          21m
kube-system            coredns-7d7755744b-ls5d9                                  1/1     Running                      0          21m
kube-system            kube-proxy-wllff                                          1/1     Running                      0          14m
kubernetes-dashboard   dashboard-metrics-scraper-f7b5dbf7d-rm5z7                 1/1     Running                      0          4m28s
kubernetes-dashboard   kubernetes-dashboard-7447f48f55-94rhg                     1/1     Running                      0          4m28s
monitoring             alertmanager-prometheus-operator-alertmanager-0           2/2     Running                      0          78s
monitoring             metrics-server-7dfc675884-q9qps                           1/1     Running                      0          4m24s
monitoring             prometheus-operator-grafana-9bb769cf-pjk4r                2/2     Running                      0          89s
monitoring             prometheus-operator-kube-state-metrics-79f476bff6-r9m2s   1/1     Running                      0          89s
monitoring             prometheus-operator-operator-58fcb66576-6dwpg             1/1     Running                      0          89s
monitoring             prometheus-operator-prometheus-node-exporter-tllwl        1/1     Running                      0          89s
monitoring             prometheus-prometheus-operator-prometheus-0               3/3     Running                      1          72s
Your gitops cluster
Welcome to your fully gitopsed cluster. By choosing the app-dev Quick
Start profile, you will now also have the following components running
in your cluster:
- AWS load balancer controller -- to easily expose services to the World.
- Cluster autoscaler -- to automatically add/remove nodes to/from your cluster based on its usage.
- Prometheus (its Alertmanager, its operator, its
node-exporter,kube-state-metrics, andmetrics-server) -- for powerful metrics & alerts. - Grafana -- for a rich way to visualize metrics via dashboards you can create, explore, and share.
- Kubernetes dashboard -- Kubernetes' standard dashboard.
- Fluentd & Amazon's CloudWatch agent -- for cluster & containers' log collection, aggregation & analytics in CloudWatch.
- podinfo -- a toy demo application.
It's easy to confirm if all of this is up and running for you. Let's
check podinfo and see if it's up.
kubectl get service --namespace demo
NAME      TYPE        CLUSTER-IP       EXTERNAL-IP   PORT(S)    AGE
podinfo   ClusterIP   10.100.255.220   <none>        9898/TCP   2m
Now let's port-forward the service, so we can easily access it:
kubectl port-forward -n demo svc/podinfo 9898:9898
If you open localhost:9898 in your browser, you will see
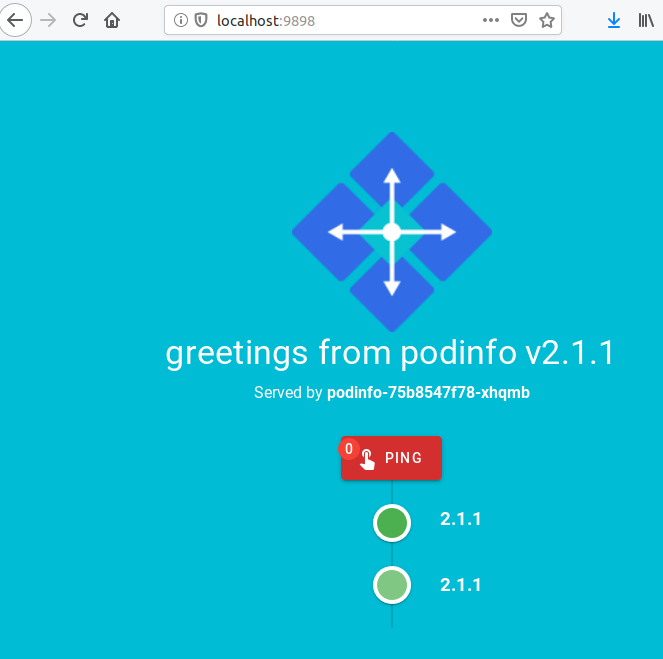
Congratulations to your gitopsed cluster on EKS!
Advanced setups
Creating a cluster with Gitops in one command
If you already have experience with Gitops in eksctl you might want to create a cluster with a Gitops setup at once. To do that, simply add the Gitops configuration to the cluster's config file like in the example below:
---
apiVersion: eksctl.io/v1alpha5
kind: ClusterConfig

metadata:
  name: cluster-21
  region: eu-north-1

# other cluster config ...

git:
  repo:
    url: "git@github.com:myorg/cluster-21.git"
    branch: master
    fluxPath: "flux/"
    user: "gitops"
    email: "<username>@users.noreply.github.com"
  operator:
    namespace: "flux"
    withHelm: true
  bootstrapProfile:
    source: app-dev
    revision: master
This configuration will install Flux and Helm, and set up the repo git@github.com:myorg/cluster-21.git so that any
Kubernetes manifest added there will automatically be picked up and applied to your cluster by Flux. Once the cluster is
created, the repo will also contain the manifests used to install Flux and Helm, so any further configuration can be
done directly in a Gitops way! Just modify the manifests, commit the changes and push them to the repo.
Handcrafting your configuration
eksctl enable profile can largely be decomposed into
eksctl generate profilegit commitgit push
In this section we will use eksctl generate profile, so you can easily
handcraft your workloads' configuration locally, before pushing these to manage
them in Git.
During the previous call (eksctl enable repo), we instructed Flux
to watch a repository and deploy changes to the cluster. This
repository is where the workloads are defined. Now we will add
the config of the infrastructure tooling as well.
eksctl has the ability to use a base config for for the
infrastructure tooling, also known as a Quick Start profile. So if your
organisation already has experience in setting up clusters and use the
same defaults, it makes sense to use those as a profile. You could
be entirely starting from scratch here too. What we will do in this part
of the tutorial is using weaveworks/eks-quickstart-app-dev, which is
the app-dev gitops Quick Start profile. To create your own profile
check out the documentation.
Now please run:
eksctl generate profile \
    --cluster wonderful-wardrobe-1565767990 \
    --profile-source https://github.com/weaveworks/eks-quickstart-app-dev.git \
    --profile-path ~/dev/flux-get-started/cluster-config
Let's break this down here. eksctl generate profile at the very
least wants:
--cluster: the name of the cluster - checkeksctl get clusterto see what the name of yours is--profile-source: the Git URL of the Quick Start profile to deploy to the cluster--profile-path: a local path: this is an empty new directory (herecluster-config) you create in your local checkout of the config repository, which we used in the previous command
The Quick Start profile can be something you and your organisation tailored to your needs, but can be something like our app-dev Quick Start profile as well. It is meant to be a starting point for clusters you can iterate over.
So after all this preface, what happens when we run the command?
eksctl will check out the Quick Start profile (here we use
app-dev profile) in an empty
sub-directory (cluster-config) of the local checkout of your repo
flux-get-started.
All that is left now to get our cluster components managed by Flux is to commit them to our config repository:
cd ~/dev/flux-get-started/cluster-config
git add .
git commit -m "add cluster config"
git push
Flux will pick this up in its next sync and make the changes to your cluster.
In our case we are going to see these new arrivals in the cluster:
kubectl get pods --namespace kubernetes-dashboard
kubernetes-dashboard   dashboard-metrics-scraper-f7b5dbf7d-kwz7n   1/1     Running   0          4m
kubernetes-dashboard   kubernetes-dashboard-7447f48f55-2pl66       1/1     Running   0          4m
All of the cluster configuration can be easily edited in Git now. Welcome to a fully gitopsed world!
Conclusion
We look forward to hearing your thoughts and feedback. Please get in touch and let us know how things worked out for you.